Showing posts with label adjusting your photos. Show all posts

Sunday, January 17, 2010

Waiting for Your Next Sale? Don't!

It is a helpless feeling.....putting all your love into creating and posting your items, only to find slow traffic to your shop, low views and no sales. But don't pout! Turn a negative into a positive!

Now is the time to get creative and revamp your shop!


Photos
  • Have photos that don't seem to fit? Blurry? Dark? Now is the time to retake and experiment with new backgrounds and lighting! Even just adjusting them a little more in photo editing software can give it that something extra to encourage more views.
  • Maybe your photos aren't so hot to begin with? This does take a lot of time and practice, but with so many blogs dedicated to offering photo tips (including this one!), you can't go wrong! Try researching more in the forums on how to improve them. The better your photos, the more views you are likely to have. 
  • Keep your shop looking fresh by arranging it every so often and featuring different items.
  • If you have an item that seems to get low views, try switching the photo with another one in your set of five. This can sometimes work magic!
  • Head to the forums for some critiques. Etsians are kind and will really help you! 
Text
  • Why not try expanding on your descriptions? What makes the item special? Have you described the color, texture, size sufficiently? Who could use the item? Is there a story behind why you created it?
  • What about rechecking the spelling of your listings and shop announcement? Typos make your shop look less professional and are so easy to fix!
  • Are your policies clear? Maybe there is something else you would like to add to help your customer understand the checkout process? 
  • Always keep your shop announcement current. There is nothing worse than a sale announcement for last month there!
Avatars and Banners
  •  Try changing your avatar every so often. Choose your best photos of items that really stand out. You never know when a seller in the forums will get tempted to click!
  • What does your banner say about your shop? Are you using crisp photos and clear text? There is a great article on how to create your own banner on Etsy.  But if you don't have the time or the graphic design skills, don't worry. There are shops that sell branding packages with banners, avatars, and business cards rolled into one! Just do a search on Etsy!
Free Exposure
  • Search the forums for blogs looking to feature shops.
  • Have a Blog? Host a giveaway! Tweet about it, tell your friends, post a promo thread in the forums!
  • And I am sure you know all about social networking on Facebook. Myspace, and Twitter!
But most importantly......keep crafting! Keep adding new items to your shop and enjoying what you love to do!!

*What do you do while you wait for your next sale?

Friday, November 6, 2009

Part 3 - Crop til' You Drop - Better Photos, Better Sales

Welcome to part 3!

Now that we have the general technical stuff out of the way, let's talk composition. Although this part can be very subjective, here are a few things to think about when setting up your photos.

Props and Background:

  • If you do choose to use props go for something relevant, simple and not distracting. Your beautiful work should be the focus of the photo, not a noisy pattern or detailed environment.
  • You want the colors of your background to compliment the colors of your item. It was once suggested to me to consult the color wheel. If my item was one color, I was to find a color on the opposite end of the spectrum to contrast it. Honestly, after great trial and error, I have found solid white, black, or neutral colors work best for me! My motto: keep it simple!
Other random bits:
When photographing dark items I tend to put them on a white background and vice versa for light items. For jewelry, I like to put gold on a white background with a little higher EV setting and silver on black or gray background with a slightly lower EV setting.

Angles:

  • This is the part where you need to get creative! Get as close to your item as you can and experiment with how many different ways you can take your photo. 
  • Etsy allows you to upload 5 photos. Use them! All the photos need to be different and show your product from various sides. Show the back, front, top, bottom and inside if there is one. If you use a prop, have one with a prop and one on its own. Remember, customers cannot touch and feel your item. They will need to do this with their eyes and it is up to you to give them some eye candy (and a true representation of your product)!


Ok it is time to use your photo editing software!

Cropping:

  • One of my secret weapons for great composition? Crop close. Really close. Yep that's it! It works very well for photos of small items. If you used your macro setting, there should be wonderful crisp detail, so the closer you crop the closer you "zoom" into it.
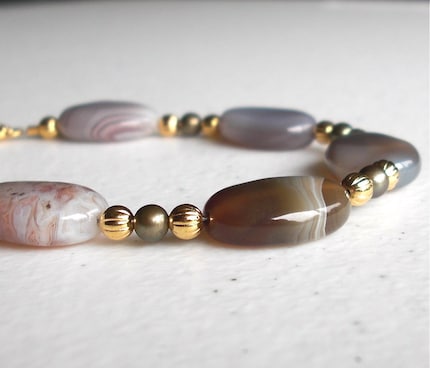
  • Just like you need to experiment with angles, experiment with your cropping. If you have a photo of your item in full, try cropping part of the item to create interest and show detail- similar what I have done with my Halo bracelet below.


Adjusting Your Photos Further (a few more tips!):

  • If you feel your photo is a little dark, go ahead and lighten it up bit with the "fill light/exposure" and "highlight" option. You can also add shadow to overexposed photos and play with the contrast to find the right balance. Just don't go too far or your photo will look unnatural! Once again, if you need to adjust the photo too much, it is better to take it again.
  • I always like to bring up the highlights for a brighter sheen. I would rather increase the highlights on a photo that is slightly underexposed than begin with an overexposed photo. Sometimes neither works and I am back to the drawing board! 
  • To perfect your photos further, find the "sharpness" option in your software. I always sharpen just a little bit to get crisper edges to my photos. 
  • Very often on Etsy the photos tend to look washed out when you upload them. Want those colors to really pop? After you adjust your photo and like what you see, head over to "saturation". Increase the saturation a little more than you think matches the true color. When you upload it to Etsy you will find that eye popping color you were looking for! 

Taking product photos is an ongoing process for all of us, including myself! I am still constantly experimenting to find new ways to take my photos. However, I do hope this helps you help you understand the basic ways you can improve your photos. There will definitely be more on this topic in the future!

If you have questions you would like to be addressed in the blog feel free to comment and let me know. Thanks so much to all who have given me so much feedback already. Keep it coming!

And stick around for our next posts on promoting your items, landing a a treasury, and tax info from a special guest blogger!!!